Modern technologies have long allowed us to enjoy family photographs from PC, phone and tablet monitors.
But it is from the printed photos that it blows with warmth, family comfort and love.
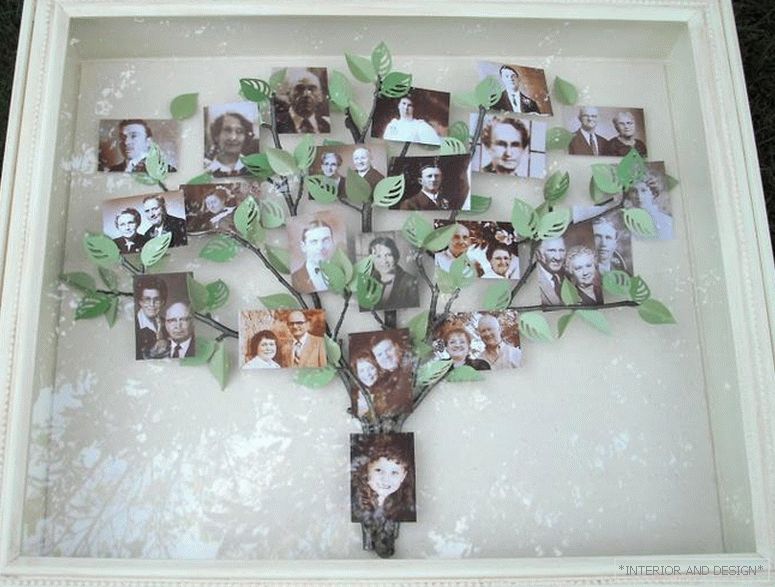
Today we will show you the original way to save printed photos and decorate your home.
To create a 3-D-tree for family photos, which will be a cool accessory in the design of your living room, you will need:
- Family photos
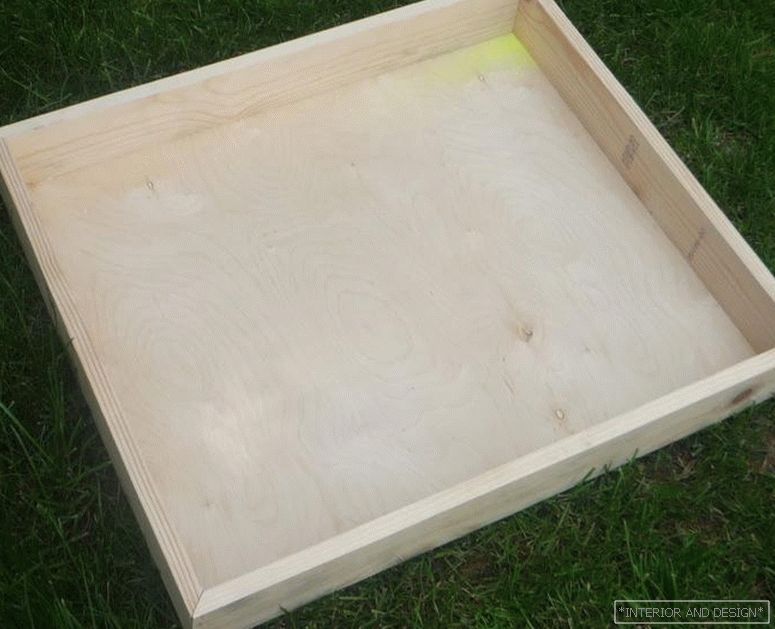
- Wooden box
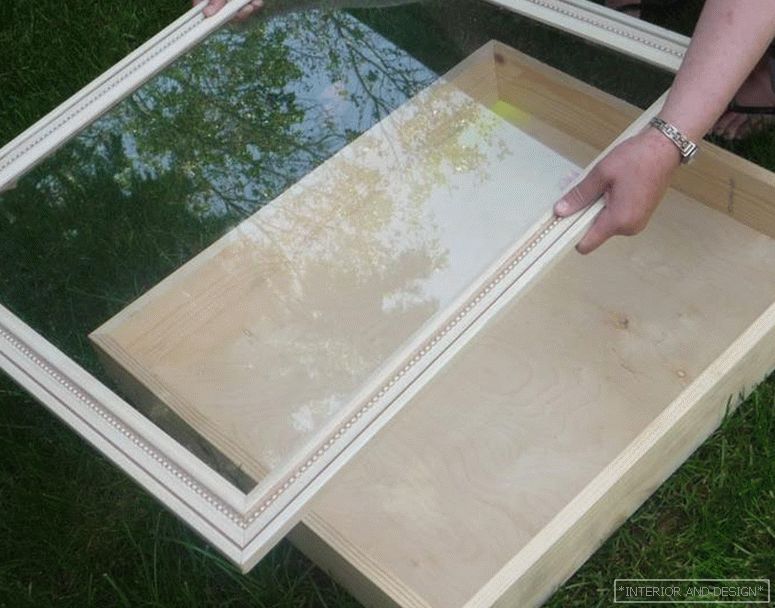
- Wooden frame with glass, the same size as the box
- Thin foam
- Scissors
- Cement
- Wooden stick (stylus)
- Paints
- Glue (eg, “Moment Crystal”)
- Artificial leaves
- Wall hinge
- Nails
So:
Step 1.
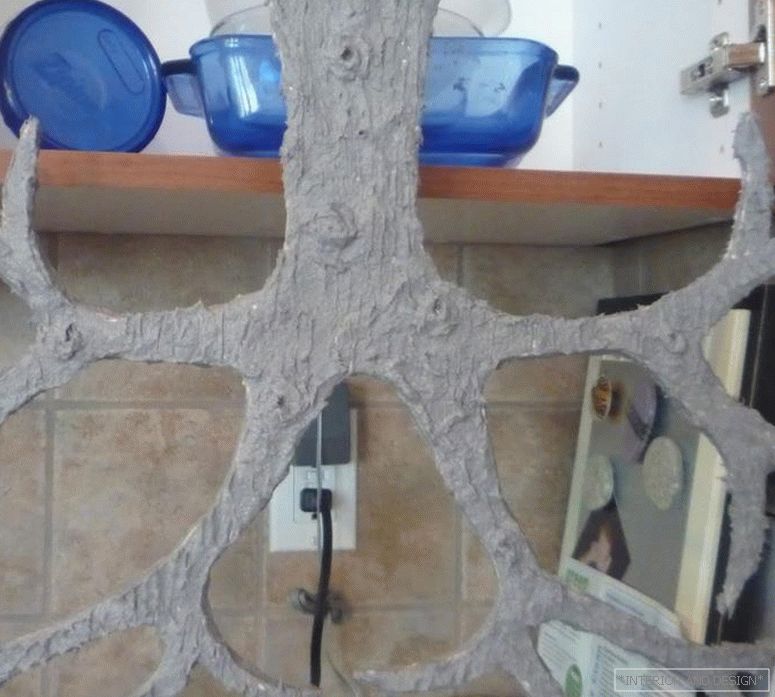
From a thin foam cut the silhouette of a tree. The width and height of your tree should be placed in a wooden box.
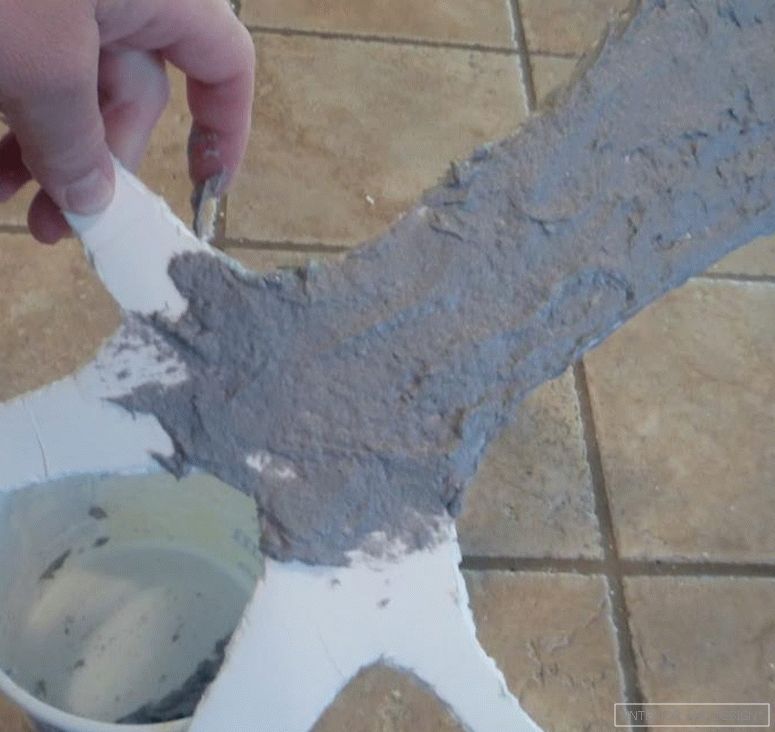
Step 2.
Apply the cement mixture on the foam base. It does not need much, just a small amount remaining after the repair in the kitchen. With the help of wooden sticks we draw veins and knots imitating the bark of a tree. Give dry.
Step 3.
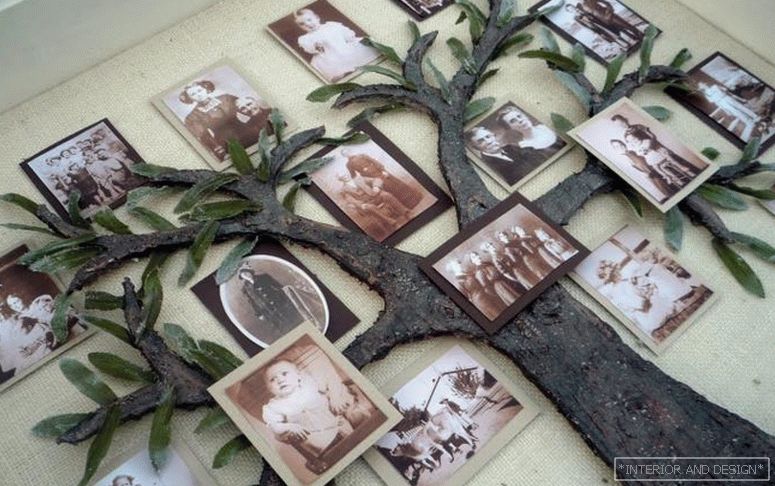
Coloring the tree.
Step 4.
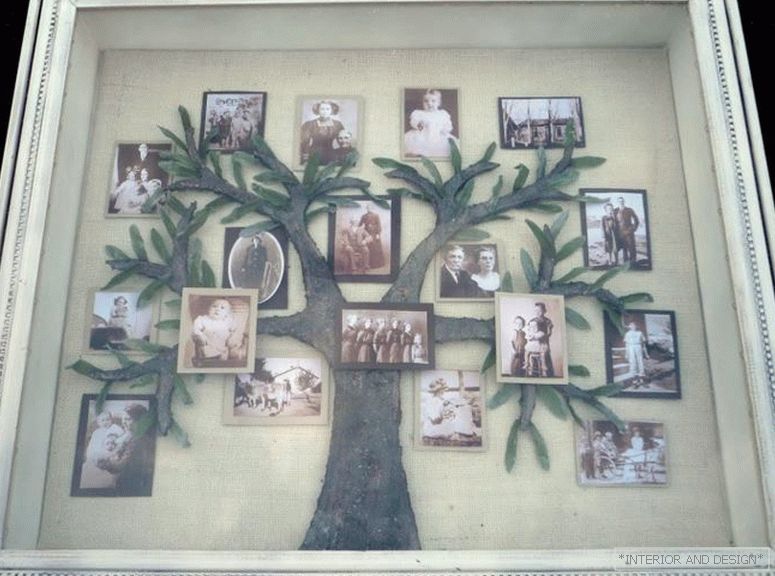
Glue the tree inside the box. We place photos. We decorate with artificial leaves.
Step 5.
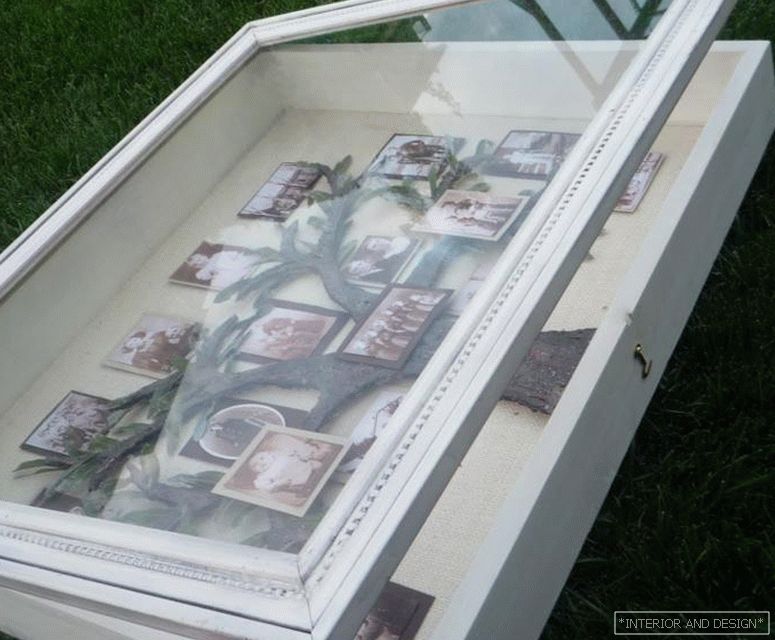
Cover the composition with a glass frame with glass. If necessary, we make fixtures and locks so that the frame opens. In this case, the tree can be supplemented with new photos, if another small resident appears in your nursery.
Step 6.
Fastened to the back of the box loop and hang the resulting masterpiece on the wall.
P.S. If you are too lazy to fool around with foam and cement, the tree can be “gathered” from twigs (artificial or real).