 Owners of country sites have long appreciated the convenience of hozblokov and use them for many household needs. What is such a unit, what is it for, is it worth it to buy, or will a skilled owner be able to build this structure on his own? This is what the article will be about.
Content
- 1 What is a hozblok?
- 2 Variants of the design of power blocks, their pros and cons
- 3 How to make a hozblok
- 3.1 Basic construction rules
- 3.2 What materials will be needed for the construction of the hozbloka?
- 3.3 The construction of the hozbloka
What is a hozblok?
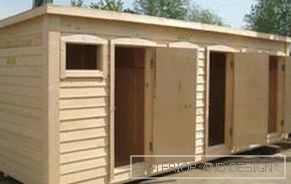
Light non-residential building without foundationlocated on the site and used to store various items, called hozblok. Inside there can be one room, or several separated by partitions. This name is common to buildings for various purposes, including:
-
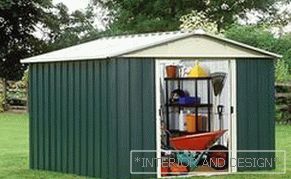
 storage of garden equipment;
 - summer workshops;
- dog houses;
- three-section buildings with utility room, summer shower and toilet;
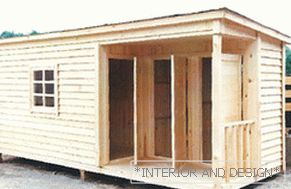
- Three-section buildings with a pantry, bathroom and a lounge or a covered veranda.
Summer residents are often attached to the hozbloku shed for storage of woodpile, also in sections, if there is sufficient illumination, a poultry house or a small greenhouse can be located.
Variants of construction hozblokov, their pros and cons
Manufacturers offer a choice two categories of power blocks:
- monoblock;
- collapsible.
Monoblocks изготавливают на базе металлического контейнера или с использованием сварного frameа, в углах кровли у них предусмотрены специальные проушины для транспортировки с помощью автокрана.
Benefits whole modules:
- availability of internal communications. It is enough to install the facility at the chosen place and connect it with external networks;
- installation speed (on average 2−3 hours) e
disadvantages: delivery complexity. Do not do without special equipment: a lifting truck crane, container truck.
Average prices: 18−40 thousand p., depending on the size, materials and functionality.
 Collapsible blocks delivered to the customer in a disassembled state. The installers are working on the installation, sent by the manufacturer.
Benefits collapsible blocks: simple delivery, all the elements can be compactly packaged, and then assembled by a markup ready utility unit, as a designer.
disadvantages:
- for installation will require specially trained people;
- all communications must be installed from scratch;
- the work may take more than a day.
Average prices: 35−90 тыс. р.
Another classification divides the entire range of hozblok by plating material walls and roofs:
-
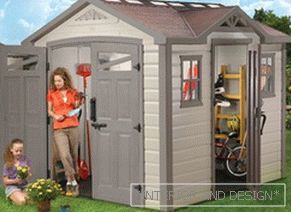 Plastic. Light panels, simple connection, relative cheapness, but problems with thermal insulation.
 - Tree. Aesthetically attractive, has good thermal insulation properties, after appropriate treatment, it becomes hygroscopic, but requires careful maintenance.
- Metal. The most durable, durable and reliable material, but in need of anti-corrosion coating.
According to the design number of sections hozbloki are:
- whole;
- two-section;
- three sections.
Additional sections can be used for various purposes, from rest to keeping pets and birds.
How to make a hozblok
Basic construction rules
Main criteriathat should be considered when designing a hozblok, are:
- Maximum effective use of space;
- Неприхотливость, the ability to go long without repair;
- From communications necessarily electricity. The presence of the rest of the benefits of civilization is dictated by the purpose for which you are building a building block.
Regarding the choice of place to host hozbloka exist requirements SNiP 30−02−97:
- if you plan to keep a bird, animals or a lavatory inside, the distance from the block to the walls of the dwelling should be minimum 12 m, to the borders of foreign adjacent areas - 4 m;
- if you are going to build a summer shower, then before housing - not less 8 m, to the borders of neighboring possessions - 1 m.
If you do not comply with these requirements, you may encounter problems when selling your plot with buildings. Government agencies will not make out the transaction until the planning of the territory is brought in line with the SNiP
What materials will be needed for the construction of the hozbloka?
-
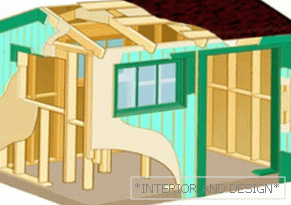 cement, sand, gravel, pipes, fittings - if you decide to do foundation;
 - брус или несущие профили из металла, обшивочные доски, анкера для скрепления frameа здания;
- trim panelsroof and wall finishing materials;
- electric drill, drill, screwdriver, handsaw, ax, shovel, wood screws.
Since hozbloki characterized by low weight, as a rule, laying the foundation for them desirablebut not required. In some cases, installed concrete blocks on the sand bed or screw piles.
The construction of the hozbloka
- Determine the location under construction, mark it up and prepare it.
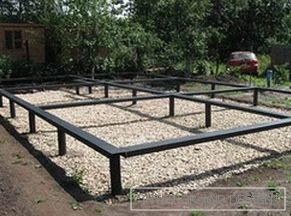
- Заложить foundation. The depth of the pit is a little more than the freezing limit of the soil, on average 60–100 cm. If you are going to build a shower and closet, the foundation is laid not only around the perimeter of the block, but up to the septic tank line. Most often, hozblok put on six-structure design as follows:
- we cut off the layer of earth on the perimeter area, we fall asleep with fine gravel or sand, we tamp, we cover with another layer, we again tamp;
- mark the ends and midpoints of the wide sides of the building;
- do in these points excavation piles. Поперечник свай — not less 20 см;
- in each hole we fall asleep to the bottom of 10 cm of sand or gravel, rammer;
- referring to the level, install asbestos-cement pipes in the notches;
-
 1/3 poured into each tube cement solution. Затем нужно приподнять трубу на 10−15 см и зафиксировать в таком положении на 2−3 дня, пока цемент не высохнет. Это создаст «бетонную подушку», диаметр которой будет больше диаметра трубы, что предотвратит в будущем подъем или перекос foundationа при смене сезонов;
 - then we will need 4 pieces of reinforcement диаметром 1 см. Длина рассчитывается так, чтобы not less 15 см были погружены в раствор, а 20 см выступали наружу. Готовим цементный раствор и аккуратно заполняем ёмкость, поместив арматуру в центре. Следим, чтобы не было пустот. На отвердение свай уйдёт около 2-х недель. Всё это время в случае сухой погоды столбы нужно смачивать водой и закрывать от солнца.
- На foundation монтируется frame. First of all - the frame. For its production, wooden bars 15 to 15 cm are taken, which are joined at the corners with half-grooved grooves and, for greater reliability, fastened with screws on wood. To fix the frame on the piles, drill holes for protruding reinforcement. It is recommended to place a sheet of roofing material between the foundation and the frame, bending its edges so that moisture does not accumulate below. All wood elements of the building are treated with antiseptic. Along the perimeter of the grillage, you can install three logs from the bars 10 to 10 cm.
- Laying boxstarting with the end frames. All connections are reinforced with metal corners and screws. Keep in mind that one side of the frame should be longer than the other. The roof in order to save often make shed. Vertical and horizontal frame racks are placed with a frequency of 50−60 cm. This step gives a high structural strength at relatively low cost of building materials. The crossbar is made at a height of 20 cm from the frame of the grillage and consists of bars equal in length to the distance between the vertical posts connected to them “to the joint” and fixed with screws on metal corners.
-
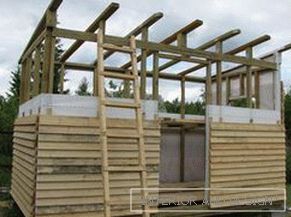 From the inside to the frame attached special paneling, heat insulation is laid from the outside, then it is sheathed with facing material (wall paneling, profiled sheet or any other). Exterior plating may be delayed until the roof is installed.
 - Rafters better buy ready-made and assembled, guided by the manufacturer's instructions. They connect with each other cratewhose step depends on the weight of the selected roofing material. Most often the roof of the hozblok is carpeted with bitumen sheets or professional sheets. But before installing the rafters, it is necessary to sew overhangs and eaves with a cut board, make the floor of the building and temporarily fix the corner posts of the frame with a board or bar diagonally.
- Do not forget about the window and door openings. You can put ready window and door unit, а можно закрепить на стойки frameа брусья, которые позже станут откосами.
- Thanksgiving. Internal walls are being built according to the initial design. There is a bathroom, storage room for inventory
etc. In the case of a summer shower installation, it is recommended to install a black painted tank on the roof in order to catch more sunlight. If warm water is needed, give preference to the heating tank. The simplest version of this design: iron tank with a lid, having a bottom drain hole. Inside the boiler is installed. A bathroom can look like a board with a seat over a cesspool, or it can be equipped no worse than in a house, with a toilet and a drain.
Regardless of whether you decide to buy a ready hozblok or build it yourself, it will facilitate the work at the dacha and will last for many years.

