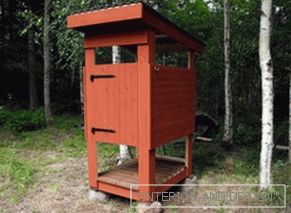
 With the arrival of a hot summer, each of us dreams of coolness. And the best way to relieve fatigue is, of course, to shower your body with cool water. In the most advantageous position are those owners who have a summer shower in their summer cottage.
Today, many companies offer ready-made designs, but it is not necessary to spend money on it, because you can make and assemble a summer shower with your own hands. Having a well-thought-out construction project, even a person who does not have experience in the construction of such structures, it is not difficult to acquire such a useful building as a summer shower.
Content
- 1 Drafting project
- 2 Foundation building
- 2.1 Pile foundation
- 2.2 Pillar foundation
- 2.3 Strip foundation
- 3 Carcass construction
- 4 Installation of the tank and organization of water supply
- 5 Warming of shower cabin
- 6 Conclusion
Drafting project
Even before you decide on the place where the shower will be built at the cottage with your own hands, you should take into account a number of important points. It is recommended to choose a place for the shower located near the well or well, then you will not need a long hose or pipe. Another important issue that you must resolve is the withdrawal of the flow. You can use a septic tank or a ditch as a place for it. If this is not foreseen, the waste water will flow directly into the soil, and from there it can penetrate into the aquifer that provides water to yours or your neighbors' well.
If you expect to build a summer shower in the country, the water from which will be warmed by the sun's rays, then you should choose a place that will be illuminated from all sides by the sun.
The most suitable place for a shower in the country is a plot surrounded by trees or farm buildings. In this case, while using it, you will be protected from prying eyes and wind.
It will be nice to have a shower in the country drainage system, which you can create on the basis of rubble. If the shower is located near the fence of neighbors, it is recommended to make a small indent from it. Keep in mind that the soil around the perimeter of the shower will always be wet, and this may not please your neighbors if you place your shower next to the fence.
Some owners choose a place near the summer kitchen for a shower in the country. For such situations, you can organize the drainage of water from the sink in the kitchen or outdoor shower. Try to take into account all the details as much as possible by displaying everything on the drawing. It should include a list of materials that you need to build a shower. Also decide the question of which option you choose: stationary or temporary, and also decide whether you will disassemble it for the winter period.
Foundation building
 Summer shower in the country, like any other building, needs a stable frame, and therefore you can not do without creating the foundation. At this stage you it is necessary to build a septic tank or to ensure the discharge of pipes from the shower to the sewer. When these issues are resolved, you can proceed to further work.
Pile foundation
Usually the owners stop the choice on the pile foundation. The technology of its manufacture is quite simple and understandable to many: using a garden auger, you need to make holes up to a depth of 1.5 m, where pipes will subsequently be loaded, and this should be done in such a way that they protrude 30 cm above the ground. These protruding ends will perform the role of piles. Asbestos-cement pipes that are 10 cm in diameter are recommended for the role of such support pillars. At the same time, they can be replaced by ordinary metal pipes with a similar cross-section.
When the foundation is ready, hewn timber is laid on it, and then they begin to perform the dressing of the pillars, which should be carried out from above. Particular attention should be paid to the assembly of the cab frame: this work should be done on the ground, after which the finished structure should be fixed to the base using bolts of suitable length.
After performing the above operations, you can proceed to the ligation of the beam, they will be assigned the role of lag to install the floor in the cabin. A couple of decades ago, this option of flooring in the summer shower had no alternative. However, nowadays it can be successfully replaced by a purchased pallet, and from it you can already organize water diversion to the grass or septic tank.
Pillar foundation
It is possible to propose another scheme for the manufacture of the base - column foundation.
-
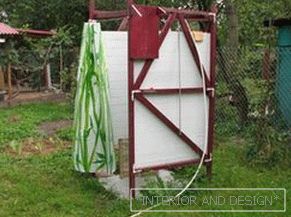 First, 6 holes are dug with dimensions of 20 x 20 cm, the length of each of which should be 50 cm;
 - After that, wooden timbering is made for each, the width, depth and height of which should be 20 cm. It is very important to make sure that it is horizontal, for which the test is carried out using a building level. In order to increase the strength characteristics of the foundation, it is necessary to additionally place three reinforcing rods in the hole, which must be fastened to each other with wire. Be sure to put a rolled up piece of ruberoid on the bottom that will protect the foundation from contact with the ground;
- then the ready-made pits begin to pour the cement mixture, and then level it, focusing on the formwork. In the center of each of the recesses stick metal studs. Moreover, this should be done in such a way that they are immersed in cement mortar by 12 cm;
- when the concrete grabs, the formwork can be removed. You need to start from the base of the foundation.
After that, you can do the installation of the prepared frame: for this fixed to protruding studs.
Strip foundation
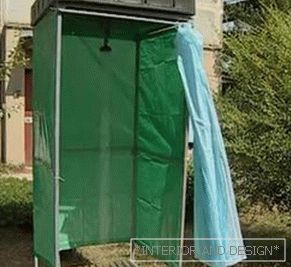 Alternative option of the base is tape. Its construction begins with marking. After a rectangle is indicated, you must make sure that its diagonals are the same. After that, they begin to dig a trench, where the strip foundation will be placed.
Channel must have same width and depthwhich should be 30 cm. Formwork is being erected from the edges of the trench. Next, the trench is poured concrete solution. Having waited for the foundation to set, it is necessary to make sure that it is horizontal. If necessary, additional leveling is carried out using a sand-cement mortar. After this stage, go to the manufacture of the frame.
Frame construction
The first thing to do is decide what the final dimensions of the building will be. One of the main tasks that must be solved here is to ensure good water pressure. This will require a barrel or any other container, which is placed at a height of 2.5 m. The optimum size for a shower cabin is is 100 x 100 cm. This space will be enough for comfortable washing and performing the necessary actions that a person has to do while using the shower.
In order to provide more comfortable conditions, you can add to the summer shower and changing room, but this should be done if there is enough space on the site. Dimensions of 160 x 100 cm are considered optimal for changing rooms. Thus, taking into account the summer shower itself and the changing room, the walls should be 200 x 150 cm thick. By adhering to this framework construction scheme, you can minimize waste when using standard size boards.
In that case, if you intend to use metal pipes or corners for the framework, then you need a welding machine and skills to use it.
At the installation stage, it will not hurt to strengthen the foundation by concreting it in the four corners of the basement, due to which your shower structure will become more stable.
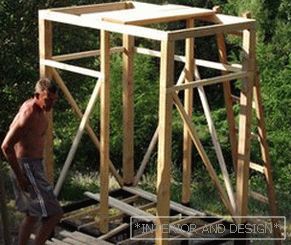 In that case, if you decide to use wooden bars for the frame, you must necessarily bandage the frame from above and below. The frame is assembled on the ground: it must be fixed with bolts, and then installed on the foundation. To secure it, it is necessary to pre-drill the holes for the reinforcement in the lower base. It is on her and will be subsequently impaled frame.
To make the structure more durable, you can add spacers to it by placing them diagonally side frames.
For plating, you can use any material that you find appropriate. Let's say it can be opaque polyethylene. Although it is the cheapest, it will not last you for too long. If you want as long as possible not to know the problems with the repair of the shower, then it is recommended to use materials like:
- plexiglass;
- slate;
- asbestos cement slabs;
- sheets of metal, etc.
In the event that your budget for the construction of a summer shower in the country is limited, you can close the entrance to the shower with a waterproof curtain. However, if you want your shower to look attractive, it would be best if you make a door for it from the same material that was used to frame the frame. The role of the roof for the summer shower can perform a flat water tank. If you failed to get such a tank, then additional work will be needed: first you need strengthen the base of the roof using jumpers, after which the material that you used for wall cladding is laid on it. After this operation, you can install the tank up.
Tank installation and water supply organization
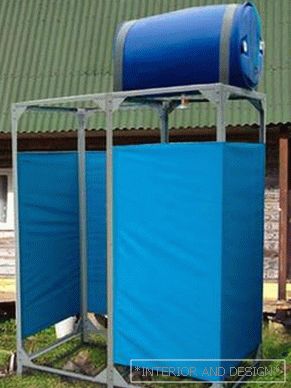 According to experts in the field of construction of a street shower, it is best to use a flat tank as a water tank. A round barrel is not suitable for this. The explanation for this is simple: if you use a flat container, the water in it will heat up more quickly in the sun than you will use round containers for this purpose. You will have fewer problems with the reinforcement of a flat tank than with a round one. In addition, it is necessary to take into account the fact that its weight will exert a uniform load on the roof. Such a solution is also preferable in that it enables you to achieve a reduction in the cost of a separate arrangement of the roof.
Even before you place the tank on the roof, you should install the crane with a nozzle and make a threaded outlet. As a sealant for the thread, you can choose silicone. Be sure to fix the water level meter in the tank. An alternative to it may be a special valve that will stop the flow of water when the tank is filled. After that, the tank can be installed on the roof.
In addition, you need to create around the perimeter of the tank a structure resembling a film greenhouse. For it, you will need a foil, which must be fixed on a container with water on the north side. This way you can minimize heat dissipation.

