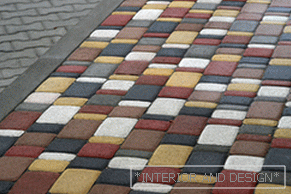
 The high popularity of paving slabs in our time due to its environmental cleanliness, operation for a long time, because it is particularly durable, as well as resistance to ultimate loads. The resistance of such tiles to low temperatures and other atmospheric factors makes it possible to expand the geography of its use. Laying technology is not too complicated. It will be able to perform even a person without much professional skill.
There are 4 like material:
- 60 × 120 mm;
- 90 × 120 mm;
- 120 × 120 mm;
- 1800 × 120 mm.
Content
- 1 Pros and cons of paving slabs
- 2 Types of paving slabs
- 3 Laying options for paving slabs
- 4 What you need for self-laying tiles
- 4.1 Base device
- 4.2 Creating a "pillow"
- 4.3 Laying tiles
Pros and cons of paving slabs
Among advantages you can note:
- possibility of creation paths, paths, wide entrances of any size, while respecting a certain pattern, pattern or configuration;
- property of mounted modules. This means that it can be removed at any time for laying communications, and then put back in place;
- when heated tile does not emit harmful substances also does not spoil, unlike an asphalt covering;
- if there are plants near the tile path, mounting the tile does not disturb the environment, since it allows air and moisture to penetrate between its segments.
Of deficiencies can highlight:
- slip coating in the winter;
- If the installation is not carried out correctly, the tile may give an uneven drawdown.
Types of paving slabs
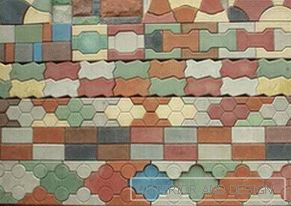 If you decide to lay on your site sidewalk tile, it is worth knowing that there are many of its varieties, and their description will help you make a choice.
- The first variety is paving stone. Due to the fact that the tiles do not fit together, an image of the royal bridge times is created. An interesting pattern is obtained if you use tiles of different colors.
- Gzhelka - on such a tile is applied a figure with a figured image of various sizes. Therefore, one element is limited to 4 smaller ones.
- Classic (smooth and rough) - on it the picture has the appearance of four segments in one tile, separated by stripes.
- Tuchka It is a winding pattern that resembles that of the surface of the earth. The unusual texture with bumps give dullness and roughness of this tile.
- Clover (smooth and rough) - the unusual shape of this tile creates the look of some kind of structure. It is very easy to work with her, she long pleases the eye with a beautiful appearance.
- Flower - this tile has rich colors, so you can create with it the real masterpieces on the tracks.
- Tile "Casso» режется при укладке под углом. Of-за этого получается готический рисунок. Основой берется орнамент из переплетенных колец.
- Maple Leaf - tile, resembling the shape of maple leaves.
- Smooth the tile is very simple, there is no riot of colors in it. It will suit those who do not like pretentiousness.
- Tile "ParquetThe ribbed surface is different, so it does not slip in winter. Reminds toffee, especially if it is brown.
- Court - this is a tile, made in the form of a hexagon. Laying will take more time, but it's worth it.
- Wave got its name because its shape has a carved surface and somewhat resembles slate.
- Clover (рельефный и гладкий). Рельефный «Clover» имеет квадратную форму со срезанными углами под круг и частями в форме круга. Гладкий «Clover» имеет более разнообразные формы, но структурно сложнее.
- Руно — это плитка с абстрактным узором и плавными контурами. Of нее получается красивый витраж или мозаика при использовании разных цветов.
- Чешуя resembles fish scales on a pattern, a volume effect is created.
- Gossamer has a spectacular drawing that makes it possible to reveal your imagination.
- Grid it can be of different colors, but its shape is unchanged. Caring for her is very simple.
- Coil - this is a tile that resembles coils of thread.
- Old city - this tile has a beautiful rounded corners. It happens in different colors.
Laying options for paving slabs
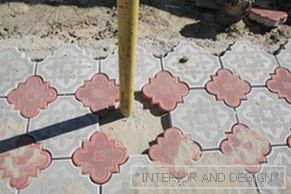 There are many forms and options for laying paving slabs, which are used for paving different surfaces. There are different methods of paving. When choosing a scheme, you need to take into account the emphasis that is obtained when using different tiles. For example, a tile laid at 45 degrees relative to a house will be conspicuous. This angle visually reduces the surface, rather than the surface with a tile laid at an angle of 90 degrees.
So, the most popular options styling:
- In the run. This form is the simplest, but it can make the surface visually narrower or wider, depending on the laying angle. This form is good if you want to visually lengthen the sidewalk. For this drawing tiles put parallel pavement direction. If you need to expand the pavement visually, then the tiles are laid perpendicularly.
- Classic pavement. This option is also called “Old Town”, which gives the surface an ancient and classic look. Due to the use of 3 types of tiles, of different sizes, you will often have to cut it.
- Form «I». This form will also give your sidewalk a classic look, in addition, it is durable in joints, so you can use it everywhere.
Curves will add grace and interest to the overall design. But to create them will have to cut the tiles, which, of course, will increase the work time, and cost.
What you need for self-laying tile
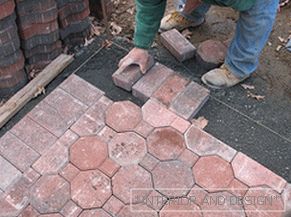 At the preparatory stage of laying paving slabs is very important correctly choose material and tools. When choosing tiles you need to focus not only on your taste, but also take into account operational characteristics. For example, if you are going to equip a covered carport or a recreation area, you should know if the tile can withstand heavy structures.
For the work required such instruments:
- wooden or rubber mallet;
- Master OK;
- manual tamper;
- building level;
- cord-order;
- pegs made of wood or metal;
- pipe of any diameter or I-beam;
- spray hose or watering can;
- broom and rake;
- sand и цемент М500.
To determine the number of tiles and the amount of raw materials you need to think about the layout, taking into account the sites and tracks. One of the main rules is the importance of the device tracks with a small slope, about 5 mm per meter, so that water can freely flow into the lawns or wells.
Base device
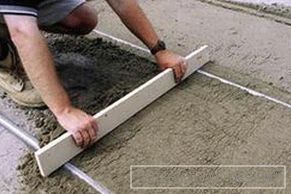 From foundation reliability directly depends on the quality of the future track. When creating the base on the edges of the future sidewalk, you need to score pegs with notches at the level of 5-7 cm. The cord is pulled along this level. Stones, a layer of turf and debris must be removed from the laying area.
In order to level the surface plot, on the ground elevations removed excess soil, and in the pits and valleys - poured. The base leveled with a rake must be carefully tamped down. If you work with soft ground, it is better to moisten the surface with water. The thoroughness of tamping will prevent uneven drawdown.
Base depth They are counting with a margin of several centimeters, taking into account that there will still be shrinkage when drowning. On average, for laying the sand layer and tile it takes 20-30 cm.
The entire track must be given a longitudinal, transverse and longitudinal-transverse slope. At this stage also need to build communication. If you pack before laying geotextilethen this will prevent the weeds from growing in the tile.
Creating a "pillow"
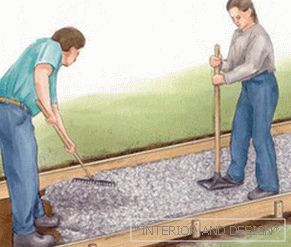 Now on the layer of soil laid out sand, который не просто увеличит стабильность тротуара, но и выступит в роли дренажа. Fromсыпанный sand разравнивается граблями и поливается водой, пока на нем не образуются лужи. Через 3−4 часа при хорошей погоде можно будет придать «подушке» гладкую и ровную форму с помощью профиля.
To give more high strength the tile can also be laid on the gravel base or on the mortar. To do this, prepare a dry cement-sand mixture of 1: 3. On the basis of the mixture is placed in an even layer, the coupler is performed channel.
Laying tiles
Before you put the tile, you need to pull on the chamfer cord-ordering. The process of laying is better to start from the curb. The first row is placed strictly on the cord. Lay the tile in the direction of "from itself." This will make it possible to avoid an increase in seams. Crosses will help to create even gaps of 1-2 mm. If laying tile turns out uneven, then with the help of a trowel under it you can lay sand or slightly remove excess.
Level out tile using level and mallet. After completion of work, the seams are filled with cement-sand mixture and poured with water. If you get a bad docking with landscape elements or buildings, the edges are trimmed.


