 Getting an early harvest in the harsh conditions of the middle lane is an important task for gardeners and summer residents. In addition to arranging greenhouses and greenhouses, there is a simple and economical way to not only grow fruit and vegetable crops ahead of time, but also significantly reduce labor costs and increase yields. Warm beds are excellent natural heaters for heat-loving crops. They consist entirely of natural raw materials, which, decomposing under a layer of earth, give the plants the necessary nutrition and heat.
Content
- 1 Positive points
- 2 Types of warm beds
- 3 Features of the device
- 4 How to make a raised warm bed?
- 5 Recessed bed DIY
- 6 Important nuances
- 7 What to plant in a warm bed?
Positive points
Warm beds have many catchy names - smart, high tech, adaptive, natural. Many gardeners have already appreciated their positive aspects, which are many:
- Rapid warming in early spring. Due to the processes occurring in decaying organic matter, the earth warms up faster and plants can be planted ahead of time.
- The ability to install a bed in any place, even in a weed-covered or barren area, the main thing is sufficient illumination.
- Relief of manual labor. Plants do not need constant weeding and digging.
- No need to fertilize. Plants will be provided with essential nutrients all season, without additional chemistry.
- The rapid development of crops and high yields. Plants grown on warm beds are disease resistant and produce more fruit. The side positive effect of such rapid development is the possibility to reduce the number of seedlings if the harvest in such quantities is not required.
- Efficient use of plant waste and tops. The problem of cleaning the garden in the fall will disappear - plants, foliage, branches and other organic garbage will become the basis for a warm bed.
- The simplicity of the device. An uncomplicated process of making your own hands.
Types of warm beds
Make a warm garden bed with your own hands can be in several ways:
-
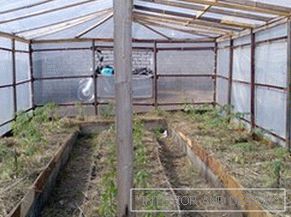 Recessed version. In this case, a trench is dug, and all raw materials are laid below ground level. This bed will be located flush with the ground or slightly rise above it. This method is more economical, because you do not need to spend money on material for the manufacture of high sides. In addition, the recessed bed dries out less and does not need frequent watering. Only in places with close groundwater flow this method is not suitable.
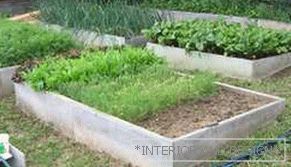
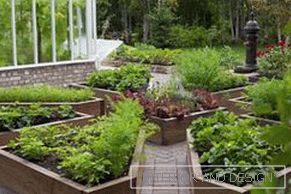
 - Raised option. This method is ideal in places where spring stasis of water and flooding are frequent. In a raised bed, warming up the land is faster, and caring for it is easier, because you do not need to bend over for tillage or harvest. However, you will need materials for arranging a high box.
- A variation of the raised option is a bed in the form of a rounded hill. It does not need to build a frame and there is a large area for planting crops.
- Combined method. The bottom layer of such a bed is slightly buried in the ground, and the top one is raised in a constructed box.
Features of the device
The principles of arrangement of different types of warm beds are almost the same: layered filling of a trench or box with organic matter and fertile soil. In the manufacture of warm beds with their own hands should consider the recommended size, so that the maintenance of plants was convenient and comfortable. Optimal are following sizes:
- width of the bed - 0,6-1,0 m;
- track width - 0.6-0.8 m;
- side height - from 0.2 m and more;
- the length is chosen arbitrary depending on the size of the area.
Warm beds are best laid in the fall in September and October. First, in the garden a lot of organic raw materials. Secondly, in the spring there is more time for landing and other activities. However, if for some reason the work was not carried out in the autumn, it is also possible to arrange a bed in the spring.
How to make a raised warm bed?
The device of a raised bed involves the manufacture of bumpers that can make from different materials:
-
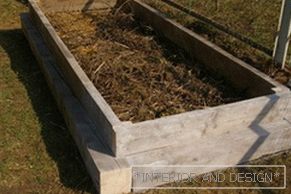 boards;
 - slate;
- galvanized metal;
- polymer curbs;
- brick and stone.
Making a raised bed do it yourself involves the following activities:
- Marks a plot of the desired length and width. Removed the top layer of soil.
- A tall box is made of scrap materials or finished fences about 40-60 cm high.
- The border of wooden boards for durability is treated with antiseptics.
- Ready box expose level.
- Metal construction net is nailed to protect crops from small pests and moles.
- If the soil in the area is clay and the moisture goes badly, a drainage layer of sand is poured at the bottom of the ditch. If the soil is peaty and the water leaves too quickly, steamed sawdust is laid out in the first layer of trench in the trench.
- The first layer is laid long-rotting large waste: branches, chocks, roots.
- Next, place the plant residues: tops, weeds without seeds, grass, cleaning and so on. Here you can put the turf removed from the site.
- The next layer is fallen leaves, a layer of rotted manure or compost.
- Garden soil is about 15–20 cm thick piled on top.
Plants in such conditions will feel great, provided with food and heat. Although usually warm beds are installed on the street, they are quite suitable for greenhouses. Features of the arrangement can be seen in the video below.
Recessed bed DIY
In the recessed version, instead of building a box, you need to dig a trench. Depending on whether the bed rises above the ground, its depth varies from 40 to 60 cm. Laying layers will be made directly into the pit, while the options for organic raw materials may differ, for example, for the northern regions there is a very interesting filling option:
-
 At the bottom of the thermal insulation layer is laid out of plastic tightly closed bottles.
 - Large organic from branches, large tops, chips and so on.
- Cardboard, paper and other waste paper.
- Vegetable raw materials, food waste.
- Well shredded branches of garden bushes and trees.
- Fall foliage (if possible).
- Compost or manure.
- Garden land mixed with compost.
At the end of each season organic garbage turns into nutritious compostthat can be used for other plants. A new warm garden is laid on the vacant place. The video below will help you better understand this process.
Important nuances
Very important when laying organic materials. observe the following rules:
- Each layer must be shed with water in order to quickly start biological processes.
- It is important to sandwich moist, dense layers of organic matter with dry and loose contents. In order for the decomposition processes to proceed properly, it is necessary to ensure unhindered air exchange.
- Use only healthy plant residues without seeds.
- In the fall, the cooked bed should be covered with black film so that weeds do not grow on it.
Another useful video and recommendations on how to make warm beds at the dacha.
What to plant in a warm garden?
On average, warm compost beds works about 4 years. If you plan your landing correctly, you can get the most out of it.
-
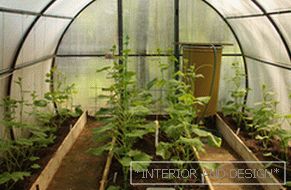 In the first year, conditions are ideal for such thermophilic plants as pumpkins, cucumbers, squash, zucchini.
 - In the second year, food is enough for the above vegetables, and you can also plant tomatoes and cabbage.
Important! The first years are not recommended to sow greens, beets, salads, radishes because of their inclination accumulate nitrates.
- In the third year, minerals are enough for carrots, potatoes, cabbage, tomatoes, beans, peppers, and beets.
- In the fourth year, you can grow only unpretentious plants, such as greens or peas.
During this time, the soil will significantly settle and become exhausted, which means that the time will come to arrange a new warm garden bed. Recycled organic materials can be added to garden land to provide themselves not only with a rich harvest, but also to improve the structure of the soil on the site.

